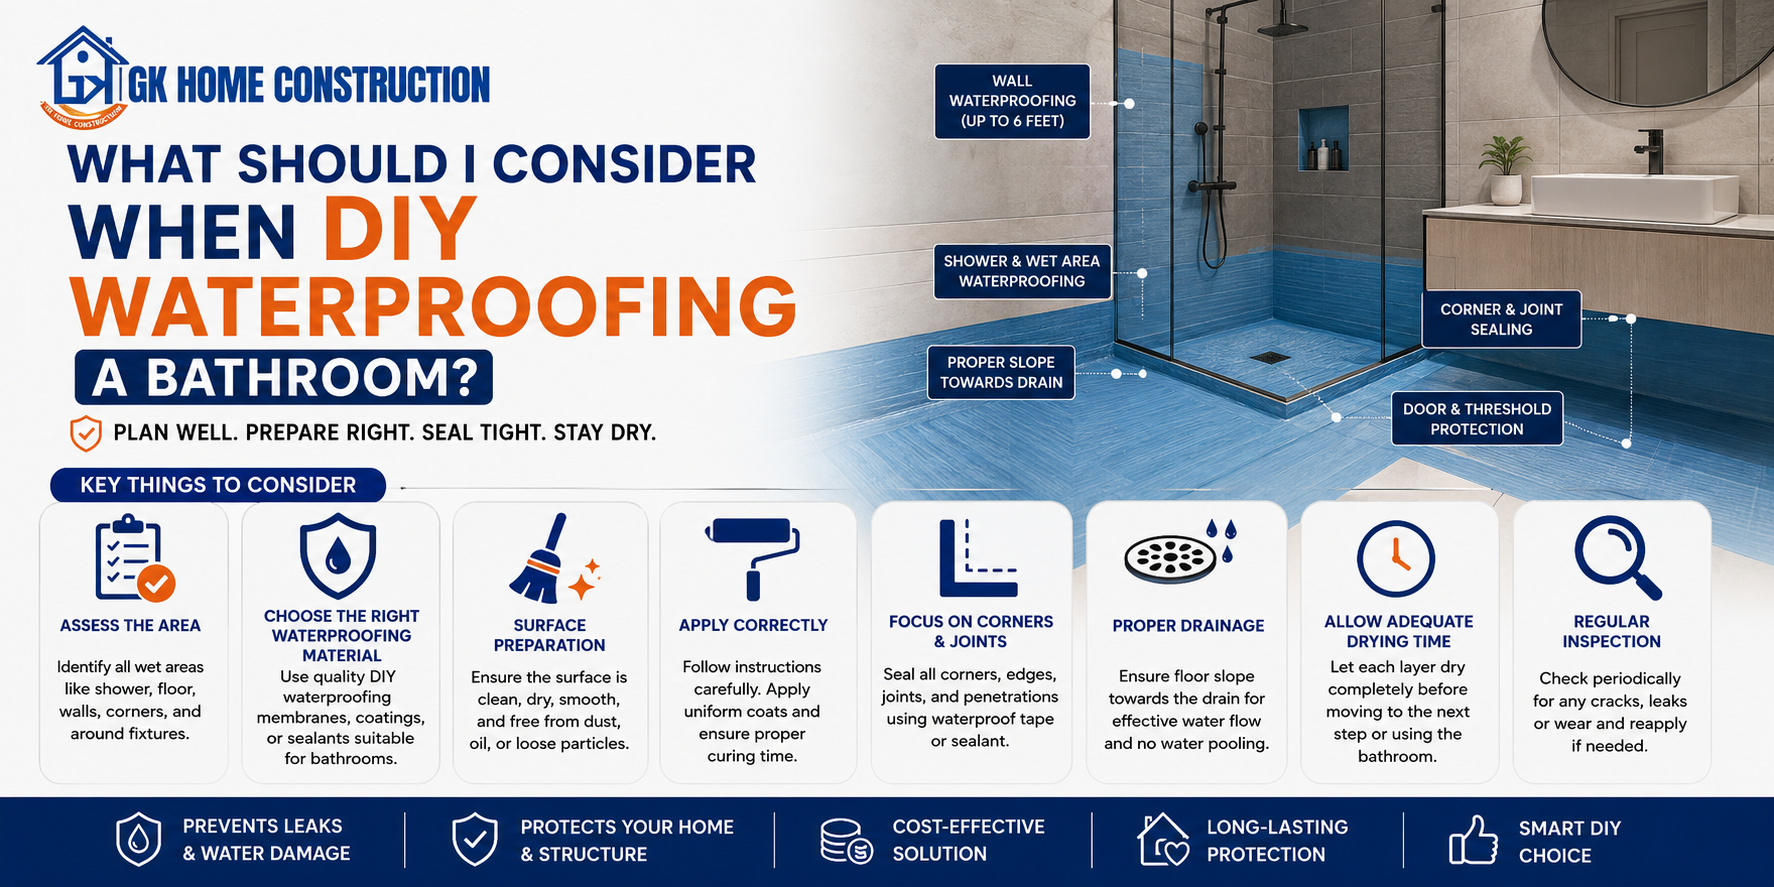
What Are the Things to Take Into Account Before Applying Water Protection to Your Bathroom?
Bathroom waterproofing is an essential step in any residential project be it the construction or remodeling of your bathroom. It plays a significant role in ensuring that your room will withstand the tests of time without any problems in its integrity and performance. However, when many people prefer doing things by themselves to save some money on the project, waterproofing requires attention to some important things that should not be overlooked. This is because any mistake at this stage might lead to some severe consequences in the future. Here at GK Home Construction, we strongly believe that an informed person is a smart one, and that is why we are ready to give you all the necessary information.Understanding Why Bathroom Waterproofing is So Important
Before getting into how waterproofing is done, there are some things that need to be addressed first. Your bathrooms come into contact with water almost everyday – from bathing to splashes of water. When bathrooms are not waterproofed, water finds its way past the tiles and grouts and gets into the walls and floor, which eventually causes mold and even the deterioration of timber structures and concrete. Not only will such a situation cost you money to rectify but could even cause major health issues to yourself and your family. Understanding the importance of bathroom waterproofing will ensure that you do things properly the first time around.
Selecting the Right Waterproofing Material
Another important decision that you need to make is regarding the choice of waterproofing material. Various types of waterproofing membranes are available in the market, such as sheet membranes, liquid-applied membranes, and cementitious waterproofing. For most DIY waterproofing applications, liquid-applied membranes have proven to be very popular and convenient. This type of waterproofing membrane can be easily applied using a paintbrush or a roller, and it results in a seamless and flexible waterproofing layer. In contrast, sheet membranes offer great waterproofing performance at joints and corners but are relatively difficult to apply without any gaps or air bubbles. Always ensure that the selected waterproofing material is fit for use in wet environments, and avoid the use of inferior products that might compromise the quality of the waterproofing work.
Properly Preparing the Surface
One of the steps that many people underestimate when doing a DIY project is preparing the surface for the membrane installation. It should be noted that proper surface preparation is crucial when installing waterproofing membranes because no matter how high-quality the membrane itself is, it will not be able to properly adhere to the surface when it is dusty, dirty, cracked, or uneven. First of all, the surface needs to be thoroughly cleaned, eliminating any old glue, paint, dirt, or other materials that could hinder the installation process. If there are cracks, holes, and gaps in the surface, fill them with a patching material, which is best done by curing them completely first. If the surface is concrete, it should also be tested for moisture content, since excessive moisture could lead to a lack of adhesion between the surface and the membrane.
Putting Extra Emphasis on Junctions and Corners
The weakest parts of any waterproofing structure are the junctions, which include the floor-to-wall transition, junctions between walls, and junctions at pipe penetrations. Since water gets everywhere, and can seep even through the smallest cracks, these transition areas are among the easiest spots for water to penetrate. The key to waterproofing junctions is to put some reinforcing fabric or bandage tape in the first layer of membrane you apply and then add additional layers on top of it. This will make the whole area flexible and able to withstand the strain from moving building structures without getting damaged. In the case of pipe penetrations, make sure to install the membrane over the pipes and use pipe collars or special sealants in the wet environment. Don’t forget to do this – this is the crucial distinction between pro and amateur work.
Using the Membrane in the Correct Number of Coats
The typical requirement for a liquid membrane waterproofing material is a minimum of two coats, while some products recommend three for places that are prone to receiving lots of water such as shower floors. Allow sufficient time between coatings, as recommended by the manufacturer, for adequate drying; failing to do so and applying the second coating prematurely is one of the most common mistakes people make in this process, and one that negatively affects the total thickness of the membrane layer. Apply using an even method and, if possible, determine the thickness of your wet film to ensure that you are applying the right quantity per square meter. Once the last coat has fully dried, test its effectiveness by pouring several centimeters of water into the shower room, blocking off the drain if applicable, and leaving it there for 24 hours to see whether there is any seepage beneath the floor or walls.
Knowing About Building Codes and Compliance
Bathroom waterproofing as a DIY project doesn't only imply technical expertise – there may also be a legal side to it. For many regions and local municipalities, there are particular building codes for the installation of bathroom waterproofing systems, especially those related to wet rooms such as shower areas and subterranean bathrooms. Therefore, before starting any bathroom waterproofing job, familiarize yourself with the relevant standards in your locality. There may be cases where the intervention of a licensed professional waterproofer will be necessary, despite having done all the installation tasks yourself. Ignoring compliance standards in this case can lead to future complications in selling your property and claiming insurance. Here at GK Home Construction, we always advise our clients to view compliance as security and quality assurance.
Conclusion
Creating a waterproof DIY bathroom can be a satisfying job if completed properly. It requires not only careful planning and preparation but also patience, good materials, and thorough knowledge of the whole waterproofing process. Every single step, from choosing the correct membrane to carrying out water test, is important and should be followed accordingly to ensure the success of your waterproofing endeavor. Be patient and take the time to choose good materials. The result will definitely make you feel safe for many years to come.