DIY Waterproofing a Bathroom: A Complete Beginner’s Guide
Bathroom waterproofing is one of the most important steps in protecting a home from water seepage, damp walls, mould, peeling paint, and structural damage. While waterproofing is recommended for major construction or persistent leakage, homeowners can handle small DIY bathroom waterproofing projects when the surface is accessible and the problem is minor.
This beginner-friendly guide explains how to waterproof a bathroom, what materials you need, common mistakes to avoid, and when to call a professional.
Why Bathroom Waterproofing Is Important
Bathrooms are continuously exposed to water and humidity. Without a proper waterproofing system, water can penetrate through tile joints, cracks, pipe openings, floor-wall junctions, and damaged grout.
Over time, moisture may cause:
- Damp patches on adjoining walls
- Peeling paint and plaster
- Mould and unpleasant odours
- Damaged flooring
- Leakage to the ceiling below
- Deterioration of concrete and reinforcement
- Costly repair work
Can You Waterproof a Bathroom Yourself?
DIY waterproofing is more suitable for minor surface-level problems, renovation work, or preventive maintenance. However, it requires careful surface preparation and correct product application.
DIY waterproofing may not be appropriate when there is:
- Severe water leakage
- Structural cracking
- Continuous seepage from concealed pipes
- Leakage from the slab
- Extensive dampness in adjoining rooms
- Damage to the existing waterproofing layer
Materials Required for DIY Bathroom Waterproofing
Before starting, use appropriate waterproofing materials and tools. Depending on the system you choose, you may need:
- Waterproofing coating or membrane
- Compatible primer
- Cement-based repair mortar
- Crack-filling material
- Waterproofing tape or reinforcing mesh
- Brush or roller
- Mixing container
- Trowel
- Cleaning brush
- Measuring tools
- Protective gloves and eyewear
Step 1: Identify the Source of Moisture
Don’t apply waterproofing over a wet or damaged surface. First, determine where the moisture is coming from.
Check areas around:
- Floor drains
- Shower areas
- Washbasin plumbing
- WC connections
- Pipe penetrations
- Floor-wall junctions
- Cracked tiles or grout
- Wall corners
Step 2: Prepare the Surface
Surface preparation is one of the most important parts of bathroom waterproofing.
Remove loose paint, damaged plaster, weak grout, dust, grease, and other contaminants. Repair visible cracks and uneven areas using a suitable repair material.
The surface should be sound, clean, and prepared according to the waterproofing product requirements.
Do not simply apply a coating over loose or deteriorated material.
Step 3: Treat Corners and Pipe Openings
Corners and junctions are common areas for water penetration.
Pay special attention to:
- Floor-to-wall junctions
- Wall corners
- Drain connections
- Pipe penetrations
- Construction joints
These areas require careful detailing because movement and gaps can cause waterproofing failures.
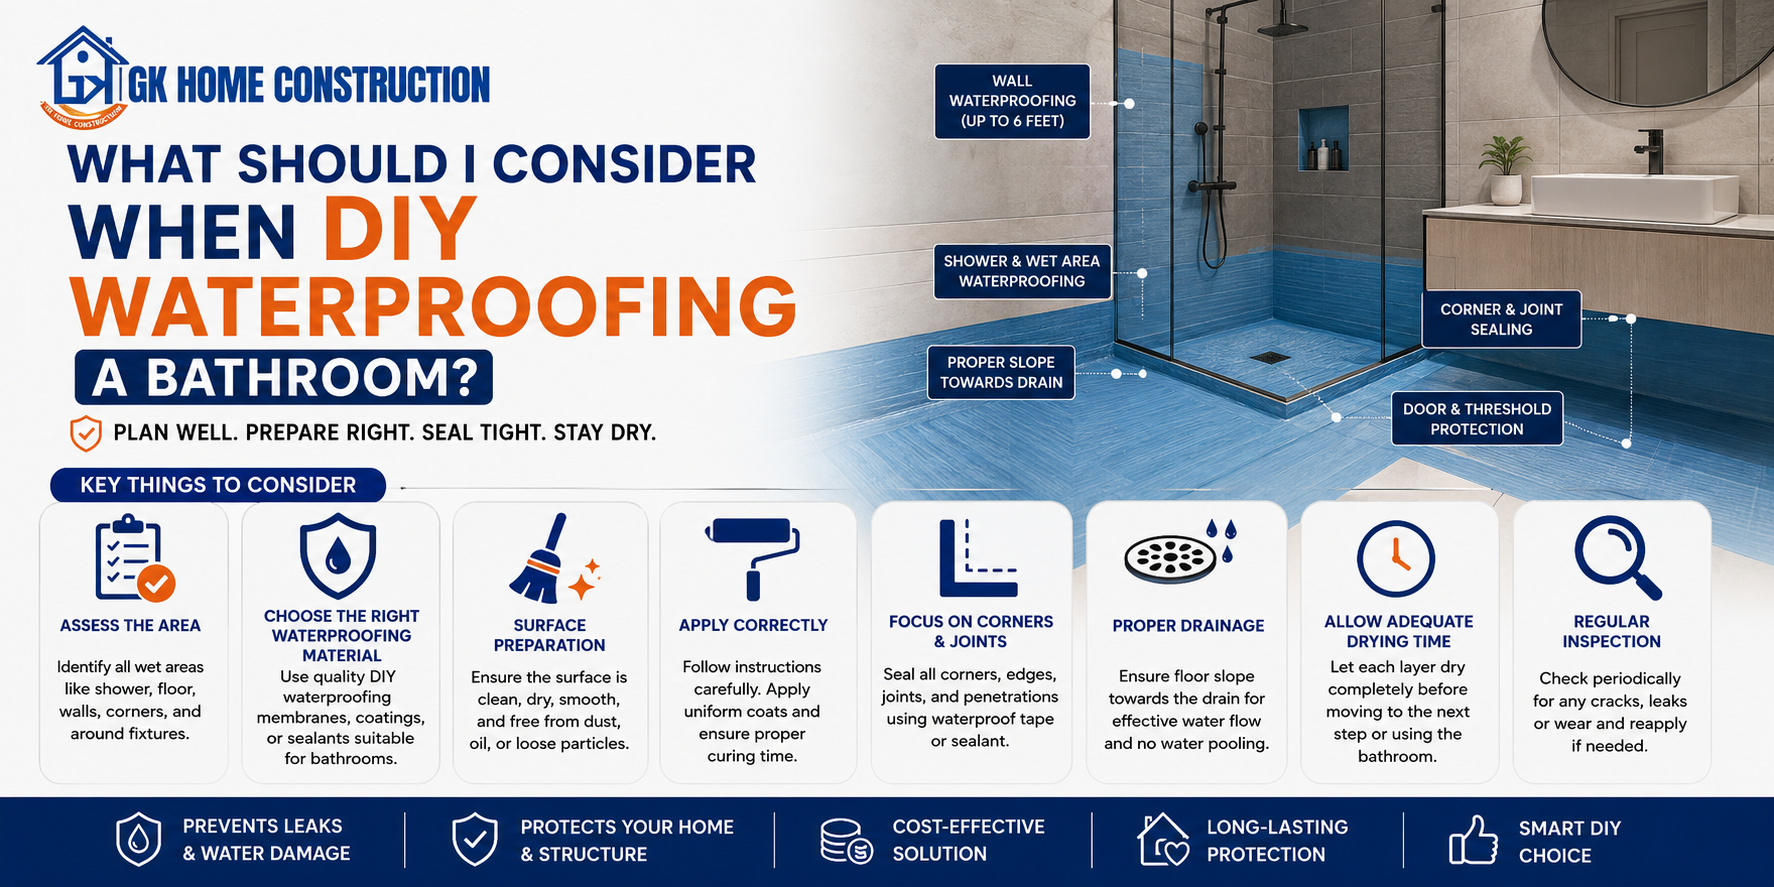
Step 4: Apply the Waterproofing System
Apply the selected waterproofing product according to the manufacturer's instructions.
many coating systems, multiple coats are required rather than one thick coat. Allow the first coat to cure or dry as specified before applying the next.
Maintain consistent coverage, especially around corners, drains, and plumbing penetrations.
Avoid diluting the product beyond the manufacturer's recommended ratio.
Step 5: Pay Attention to the Shower Area
The shower area generally receives the highest amount of direct water exposure.
Extend the waterproofing system sufficiently across the shower floor and the required wall areas according to the waterproofing system and project specifications.
The exact coverage height and detailing should follow the product manufacturer's recommendations and applicable construction requirements rather than using a one-size-fits-all rule.
Step 6: Allow Proper Curing
One of the most common DIY waterproofing mistakes is rushing the next stage.
Waterproofing materials need adequate drying or curing time. Do not install tiles immediately, flood the surface, or expose the area to heavy water use.
Follow the manufacturer's specified curing time and environmental conditions.
Step 7: Conduct a Water Test
Before covering the waterproofed area with tiles or other finishes, conduct a suitable water-retention or ponding test where the waterproofing system and site conditions permit.
Check for signs of leakage in the bathroom and the area below. If water levels fall unexpectedly or leakage appears, identify and repair the problem before proceeding.
Common DIY Bathroom Waterproofing Mistakes
Avoid these common errors:
- Applying waterproofing over a dirty or weak surface
- Ignoring pipe penetrations
- Leaving cracks unrepaired
- Applying only one coat when the system requires multiple coats
- Mixing products incorrectly
- Ignoring floor-wall junctions
- Skipping curing time
- Installing tiles before testing the waterproofing
- Using incompatible sealants or coatings
- Treating symptoms without identifying the leakage source
When to Hire a Waterproofing Professional
DIY waterproofing is not always the best solution. If leakage continues after repairs, moisture is appearing in multiple locations, or the bathroom has significant structural or plumbing issues, professional inspection is advisable.
A professional can identify whether the problem originates from the waterproofing layer, plumbing system, drainage, cracks, joints, or surrounding structure and recommend the appropriate repair method.
Final Thoughts
DIY bathroom waterproofing is useful for minor maintenance and small repair projects, but successful results depend on surface preparation, correct detailing, compatible materials, proper application, curing, and testing.
For a new bathroom or major renovation, waterproofing should be done during construction rather than as an afterthought. A properly designed and installed waterproofing system can help to protect your bathroom, adjoining spaces, and the structure of your home for years.
SEO Keywords: DIY bathroom waterproofing, bathroom waterproofing guide, waterproofing a bathroom, bathroom leakage prevention, bathroom waterproofing methods, waterproofing for beginners, bathroom waterproofing tips, DIY waterproofing guide.